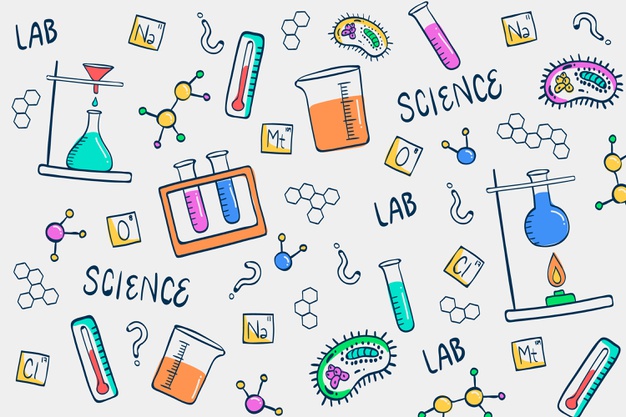
Helping kids find a interest and excitement in science and chemistry can easily be done with engaging hands on home chemistry experiments. While we have a list of great chemistry kits you can buy, there are also a number of cheaper DIY home chemistry experiments you can do with your kids or students. Anyone with a scientific curiosity can perform a number of experiments at home. Many of the items you will need are probably already laying around the house. Here are 8 ideas to conduct DIY home chemistry experiments:
DIY Rubber Eggs
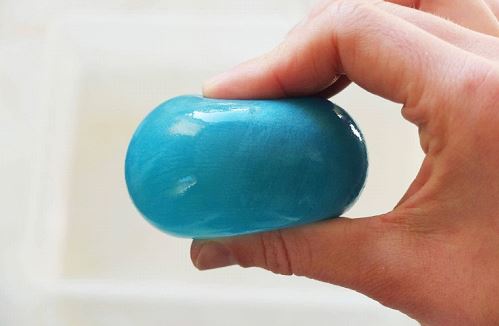
Making a rubber egg is a popular science experiment for kids. And it is so simple! A bouncing egg can be made by simply soaking an egg in vinegar for a few days.

Steps to follow for DIY home chemistry experiment:
⦁ Take a whole and unbroken raw egg and place it inside a transparent cup.
⦁ Fill the egg cup with Vinegar.
⦁ Add food color of your choice if you want a colorful bouncy rubber egg.
⦁ Wait for 3 days.
⦁ Take the shells off from the egg after 3 days wait time.
⦁ Drop the egg on table for a bouncy effect.
DIY Slime
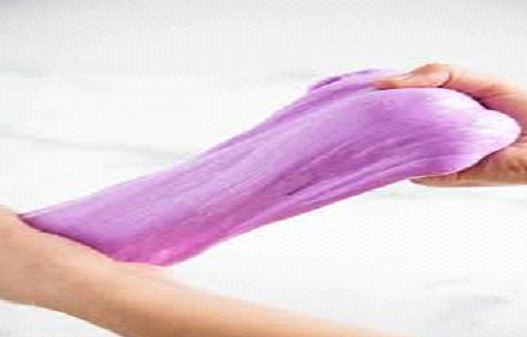
The addition of borax to a mixture of glue, water, and food coloring produces a slimy product. This is because the adhesive contains polyvinyl acetate, a liquid polymer. When borax binds polyvinyl acetate molecules together, slime is generated.

Steps to follow for DIY home chemistry experiment:
⦁ Add one and a half cup of glue (school glue, white glue, Elmer’s glue) in a bowl.
⦁ Add a few drops of food color of your choice if you want a colorful slime.
⦁ Now add two teaspoons of Borax into your glue and start stirring slowly.
⦁ After some time lift it in air to see if it is giving you “the slime effect”.
⦁ Keep your slime in an air tight jar and at cold place to make it last longer.
DIY Chemistry Volcanos
Do you have a desire to witness the explosion of a volcano from a close viewpoint? You will be able to simulate volcanic explosions right in your own garden if you try out the Volcano Science Experiment.
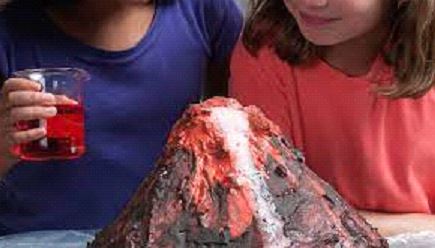
Red Volcano
Steps to follow for DIY home chemistry experiment:
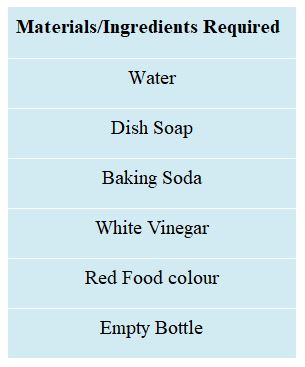
⦁ Put 10 ml dish soap, 100 ml water, and 400 ml white vinegar into a soda bottle and then add few drops of red food coloring to the mixture.
⦁ Blend together 1.25 cups of baking soda and 1.25 cups of water to create a mixture. Utilizing a spoon, thoroughly combine all of the ingredients.
⦁ Decide if you want to add anything around your bottle, like burying it and adding dirt to make it look like a real volcano! It is time for the big explosion! This mixture needs to be poured into the bottle as rapidly as possible while maintaining a meticulous approach.
Mentos and Coke Volcano

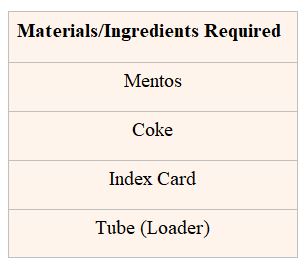
Steps to follow for DIY home chemistry experiment:
⦁ Once the Coke bottle has been opened, place it on the ground.
⦁ Using the tube loader, place the Mentos into the tube. Tube loader must have the capability of loading Mentos.
⦁ Place the index card on top of the tube and invert it.
⦁ Candies should never be permitted to escape their packaging.
⦁ Be prepared to take action. Avoid placing your face directly above the bottle since the reaction is swift.
⦁ An index card and Mentos are used to cover the bottle’s opening. Keep the Mentos candies parallel to the bottle’s opening to ensure a proper closure.
⦁ It is important to keep the candy from spilling out of the bottle. We want them to fall into the bottle.
⦁ After removing the index card, let the candy fall into the container. Then move back and watch the volcanoes of Mentos and Coke.
DIY Invisible Ink
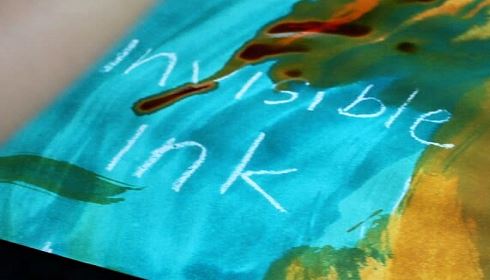
It is simple to make messages that are invisible to the naked eye using everyday household materials. Nevertheless, a dash of science enables the message to materialize out of thin air. This is an excellent method for communicating with everyone with access to the message. Here are two different techniques for creating secret messages.
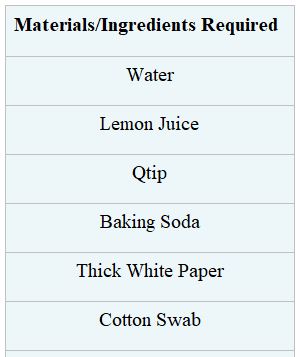
Steps to follow for heat activated invisible ink:
⦁ Dip a qtip or toothpick into a cup of lemon juice or vinegar, and write your message. After you have written down your hidden message on paper, let it dry.
⦁ To interpret the message, you will need a source of heat. To expose the message, heat the paper for several minutes (up to 10 minutes) with a hairdryer or lamp.
⦁ The acid in the vinegar or lemon juice slightly destroys the paper when heated. When acid is heated, it transforms from translucent to a different hue, disclosing the message.
Steps to follow for acid based Invisible Ink:
⦁ In a bowl, dissolve two teaspoons baking soda in two tablespoons water. Using a qtipor a toothpick, apply the mixture on a sheet of paper to write the message you want. It is preferable to allow it to air dry.
⦁ To reveal the concealed phrase, “paint” it onto the paper with a cotton swab dipped in lemon juice.
⦁ Because a base combines with an acid to produce a specific color, this approach works effectively. When sour substances (such as lemon juice) interact with bases (baking soda) to generate acids, a chemical reaction occurs This chemical process gives rise to a brand-new hue.
DIY Crystals
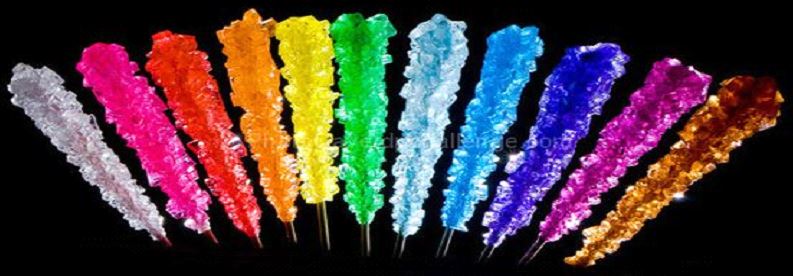
Rock Candy Crystals
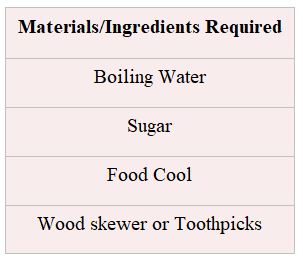
Steps to follow for DIY home chemistry experiment:
⦁ Stir the sugar into the hot water to dissolve it. If the sugar refuses to dissolve, heat the solution on the stovetop or in the microwave.
⦁ Season with a few drops of food coloring and seasoning if desired.
⦁ After the solution has cooled, pour it into the jar. Avoid catching fire at all costs!
⦁ Fill a jar halfway with the sugar solution.
⦁ In the center of the jar, place a wooden skewer or string tied to a pencil or butter knife.
⦁ Place the container in an area where it will not be disturbed.
⦁ Cover the jar with paper towels or coffee filters to keep the crystal solution clean while permitting evaporation.
⦁ The crystals may take a few days to reach their full potential. The crystals that grow on the top of the jar can be swallowed.
Borax Snowflakes
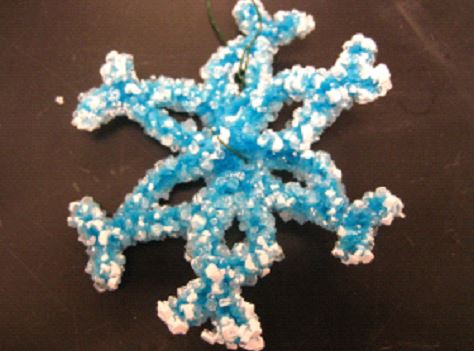
Real snowflakes are beautiful, but they fade soon. Borax can be used to make crystal snowflakes that can be used as decorations all year. Blue or any other hue can be used to color borax snowflakes.
Steps to follow for DIY home chemistry experiment:
⦁ Cut a pipe cleaner into three equal parts to produce a snowflake. It does not matter if they start out at the same length.
⦁ Twist one of the portions in the middle while holding it to connect the sections.
⦁ Ensure that the six “arms” are evenly distributed.
⦁ To keep the snowflake in place, fold a pencil or butter knife over one of your arms. The ends of the snowflake can be trimmed to fit within the jar without touching the bottom or sides.
⦁ After you have released the snowflake, put it somewhere secure.
Color Diffusion
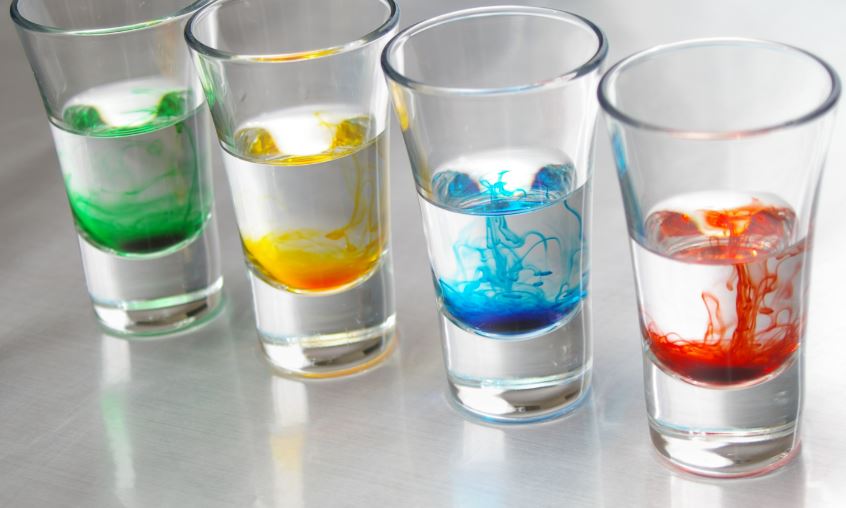
Ingredients:
- Water
- Oil
- Food Coloring
- 2 or more cups
Steps to follow for DIY home chemistry experiment:
- Fill one cup with cold water, and one cup with hot water
- Drop food color into the cold water, and then drop food color into the hot water
- Observer that the hot water gets colored more quickly, this is due to the speed of the hot water molecules moving faster
- Next, fill a glass with water and half cooking oil on top
- Drop the food coloring into the oil, which is more viscous, and see the difference in how it diffuses!
